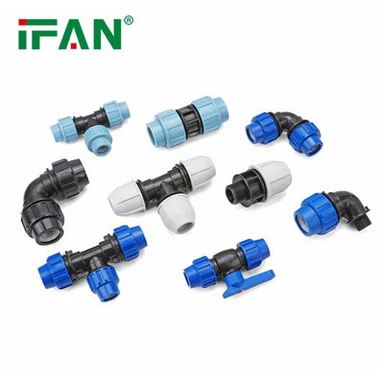

Easy Installation With Brass compression Fittings
Sep 21, 2026

|
Product Name |
Brass compression Fittings |
|
Color |
Yellow Color |
|
Size |
15-35mm |
|
Brand |
IFAN or Customized |
|
OEM |
Support |
|
Sample |
Free |
|
Experience |
30+Years |
|
Contact Us |
Welcome to contact IFAN, we are online 24 hours a day to answer your questions!
Installing a reliable pipe connection does not always require welding equipment, complicated machinery, or advanced technical skills. Brass compression fittings offer a straightforward alternative for many plumbing and fluid-handling applications. Their practical design allows pipes to be joined using a compression nut and ferrule, creating a secure mechanical connection with relatively few tools. This simplicity is one of the main reasons they are commonly used in water lines, air systems, heating equipment, and various maintenance projects. However, easy installation should not be confused with careless installation. A good result still depends on choosing the correct fitting, preparing the pipe properly, and following a consistent installation procedure. Understanding how the components work makes the entire process easier and helps prevent avoidable connection problems.
Understanding the Basic Components
Before beginning installation, it is useful to understand the three main parts of a typical brass compression fitting. The fitting body provides the connection passage and receives the pipe. The compression ring, or ferrule, fits around the pipe and is responsible for gripping and sealing it. The compression nut slides over the pipe and pushes the ferrule into the fitting body as it is tightened. These components work together rather than independently. When the nut is tightened, the ferrule is compressed around the pipe, producing a firm mechanical connection. Because the sealing action occurs through controlled compression, there is normally no need to solder the joint. This makes the fitting particularly convenient when working in locations where heat-producing installation methods are undesirable or impractical.
Preparing for the Installation
A smooth installation begins with preparation. First, confirm that the fitting size corresponds to the outside diameter of the pipe. Even a small mismatch can prevent the compression ring from working as intended. The pipe should then be cut as squarely as practical. A clean cut makes it easier for the pipe to enter the fitting evenly. After cutting, remove burrs from the inside and outside edges. The pipe surface near the connection should also be reasonably clean and free of debris that could interfere with assembly. Before inserting the pipe, inspect the fitting components for visible damage. Checking these details at the beginning takes very little time, yet it can eliminate many problems that would otherwise appear after the system has been put into operation.
Assembling the Fitting
Once the pipe is prepared, slide the compression nut onto the pipe first, followed by the ferrule. This order is important because the components must already be positioned on the pipe before it enters the fitting body. Insert the pipe into the fitting until it reaches the appropriate internal stop. Keeping the pipe properly aligned during this step helps the ferrule seat evenly. Next, bring the nut forward and thread it onto the fitting body by hand. Hand threading is useful because it allows the installer to detect cross-threading early. If the nut does not turn smoothly, it should not be forced with a wrench. Instead, remove it and check the alignment of the threads and components. A few seconds spent correcting the setup can prevent damage to the fitting.
Tightening Without Overdoing It
The final tightening step requires a balanced approach. After the nut has been hand-tightened, use a suitable wrench to complete the connection according to the fitting manufacturer's instructions. Different fitting designs may have different tightening requirements, so there is no universal number of turns that applies to every product. The purpose of tightening is to compress the ferrule sufficiently around the pipe, not to apply maximum force. Excessive tightening can distort the ferrule, damage threads, or place unnecessary stress on the pipe. On the other hand, insufficient tightening may leave the connection loose. Following the manufacturer's recommended procedure is therefore more dependable than relying on the assumption that tighter always means safer.
Testing the Connection
After installation, the connection should be checked before the system is placed into normal service. If the application permits, introduce pressure gradually rather than immediately exposing the joint to full operating conditions. Inspect the fitting for visible signs of leakage and make sure the pipe remains properly positioned. For compressed air, gas, or other potentially hazardous media, use the testing method required for that particular system. Never attempt to repair a pressurized connection by simply tightening the nut without considering the associated safety risks. If a leak appears, isolate and depressurize the system before investigating the cause. A leak may result from improper pipe preparation, incorrect component positioning, damaged parts, or an unsuitable fitting, so tightening alone is not always the correct solution.
Advantages During Maintenance
The installation convenience of brass compression fittings can also be valuable during maintenance work. Because the connection is mechanical, technicians can often disconnect and reconnect a line without using heat or specialized joining equipment. This can save time when replacing equipment, modifying pipe layouts, or accessing components inside a system. However, repeated disassembly should be handled carefully. The pipe should be inspected for marks or deformation around the compression area, while the ferrule and fitting body should be checked for damage. Depending on the manufacturer's recommendations and the condition of the components, replacing certain parts may be preferable to repeatedly reusing them. Maintenance efficiency is valuable, but maintaining the integrity of the connection should remain the priority.
Practical Tips for Better Results
Several simple habits can make compression fitting installation more consistent. Keep small components organized so that the nut and ferrule are not misplaced. Avoid using excessive force during initial assembly, and make sure the pipe remains straight while tightening. When working in a confined area, use tools that provide adequate access without placing sideways pressure on the fitting. It is also helpful to follow the product instructions instead of applying techniques intended for other types of pipe connections. Different materials and fitting designs can behave differently during assembly. A method that works well for one product may not be appropriate for another. Paying attention to these small details can make installation faster while reducing the chance of rework.
Conclusion
Brass compression fittings provide a convenient approach to pipe joining because they combine a simple mechanical design with relatively easy installation. The process does not require soldering or welding, making these fittings useful for many repair, maintenance, and installation situations. Nevertheless, dependable results come from careful preparation rather than speed alone. Selecting the correct size, making a clean pipe cut, positioning the nut and ferrule correctly, tightening according to the manufacturer's instructions, and testing the finished connection are all important steps. When these practices become part of the installation routine, brass compression fittings can offer a practical and efficient way to create secure pipe connections. Their straightforward design is especially valuable when a reliable connection needs to be installed with minimal equipment and without introducing heat into the work area.